Validate Web Security Values
Description
Validate data that will be saved in the web security system.
UX server-side security actions allow you to easily add security features to an application. The 'Validate Web Security Values' action gives you the option of adding validation capabilities to a component. In order to do this it is necessary to first define the validation rules that will handle any validation problems that occur when a user enters a value, such as a username or password. These validation rules are defined inside the Web Security settings which can be linked to from the 'Web Projects Control Panel'.
This guide demonstrates how to add a validation action to a component. First it will show how to set up the user id, password, and group settings inside the Web Security folder; that are necessary to creating a new user register. It will then show how to structure the UX data controls that will be used to enter user data. Finally, It will illustrate how these controls can make use of server-side actions that will tie them to the settings in the Web Security folder. This process is also described in this video.
Define an A5W Page
Click the 'New' button in the toolbar.
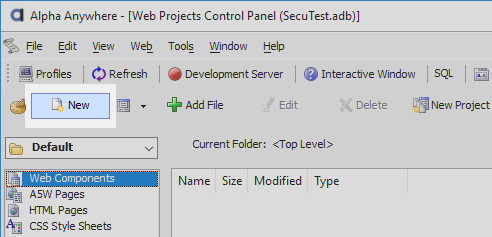
Select the 'A5W Page' option. Click 'Next >'

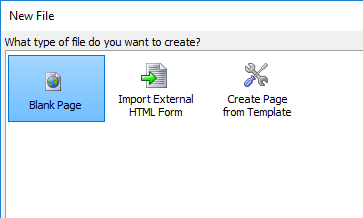
Select the 'Blank Page' option and click 'Next >' again
Go to the 'File' dropdown in the top left corner of Alpha Anywhere and select 'Save As'.
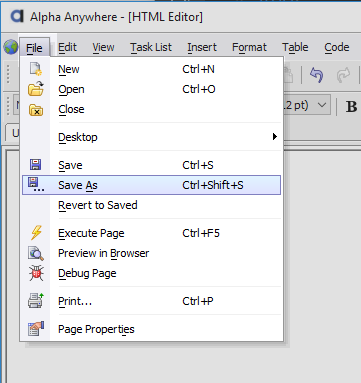
Give the a5w page the file name 'loginInfo' and click Save.

Define Web Security Settings
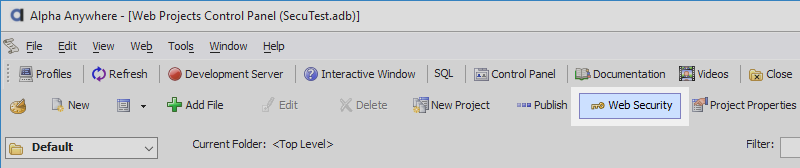
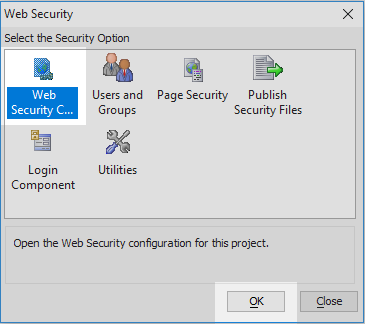
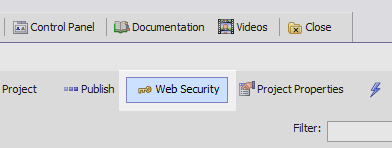
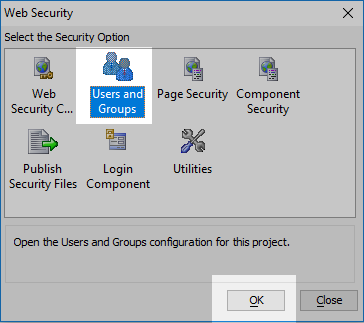
In the Web Projects Control Panel click on the 'Web Security' button in the toolbar.
Click to open the 'Web Security Configuration page.
Open the security policy pane and check the 'Security active' checkbox.
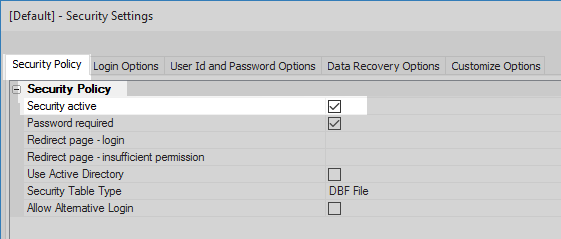
On the same pane check the 'Password required' checkbox.

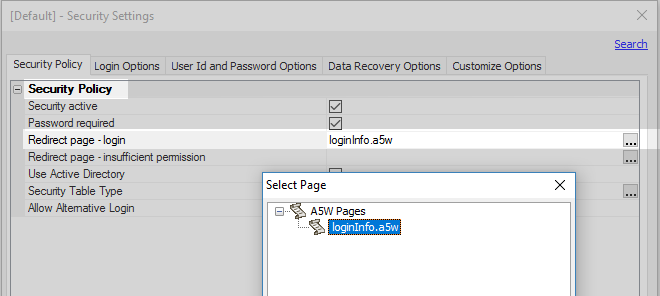
Click the [...] button next to the 'Redirect page - login' property and select the loginInfo.a5w page from the tree and click OK.
Open the 'Login Options' pane. Click the [...] button next to the 'Redirect page after login (when using login component)' property. property. Select the loginInfo.a5w page from the tree and click OK.

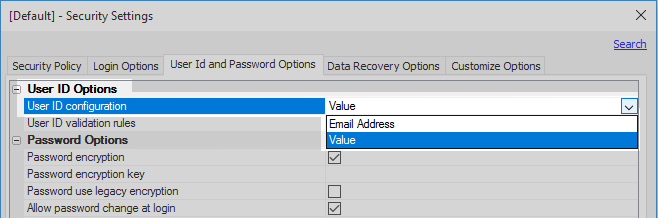
Open the 'User Id and Password Options pane. In the User ID Options section set the 'User ID configuration' property to 'Value'.
Check the 'Password encryption' checkbox
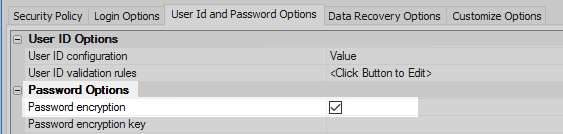
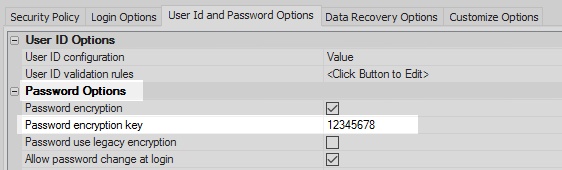
Next to the 'Password encryption key' property create a key. Click OK to exit the Web Security Configuration settings
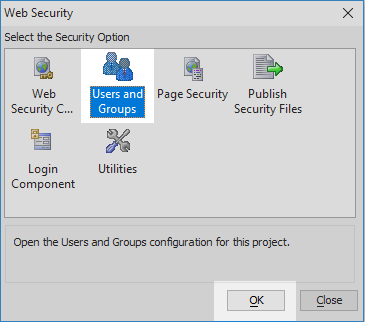
Highlight the 'Users and Groups' page icon and click OK.
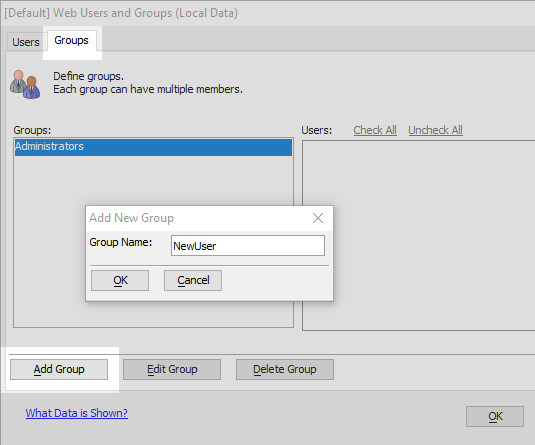
Open the 'Groups' tab and click the 'Add Group' button. Name the group 'NewUser'. Click OK to exit the page. Click Close.
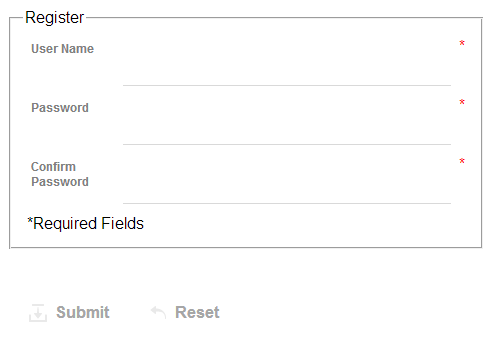
Layout Controls to Create a 'Register' UX Component
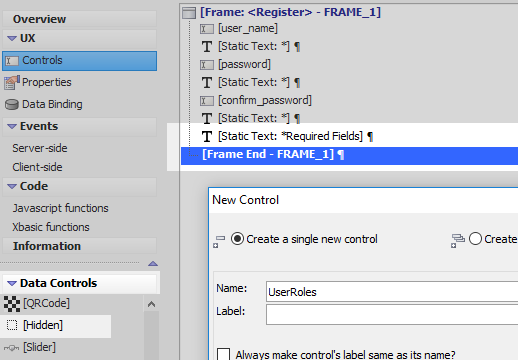
In the UX Builder, on the UX Controls page, open the 'Data Controls' menu. Click on the [TextBox] option to add a textbox control to the component. Give this control the name and label 'user name'.

Add a second [TextBox] control to the component. Give this control the name and label 'password'.
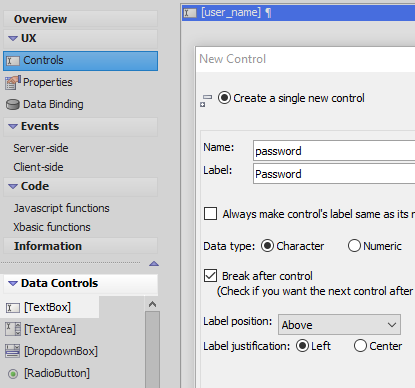
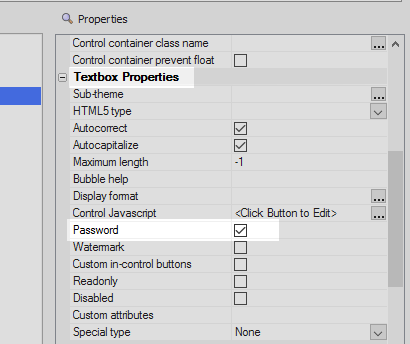
Highlight the 'password' textbox control in the controls tree. In the properties list on the right scroll down to the TextBox Properties section. Check the 'Password' property checkbox. This will hide the users password when it is entered into the textbox control.
From the 'Data Controls' menu add a third [TextBox] control to the component; with the name and label 'confirm password'
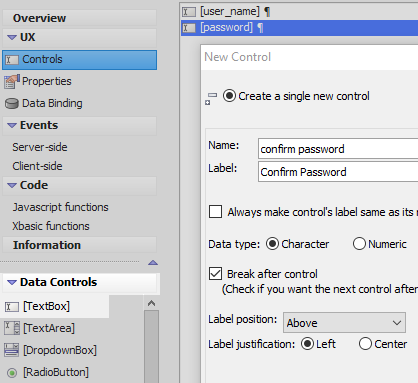
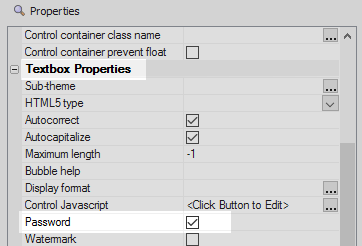
Highlight the 'confirm_password' textbox control in the controls tree. In the properties list check the 'Password' property in the 'TextBox' Properties section.
Highlight the 'user_name' textbox control. In the properties list on the right, set the 'Width' property of the control to be 4.5in. Set the 'Width of the 'password' and 'confirm_password' textbox controls to be 4.5 as well.
 Use the paste value icon to quickly apply a given value across several controls. To do this first highlight the value you want to copy, in this case the 'Width' property, and then click the icon. Click on the paste value icon in the UX Controls page toolbar to map the controls that you want to paste the value on.
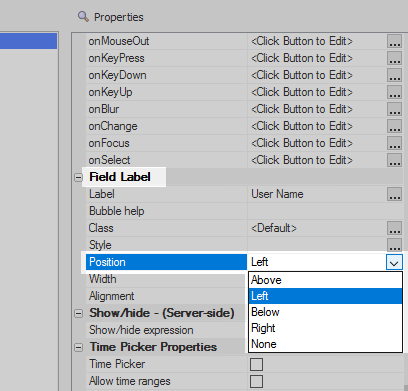
For each textbox control, also set the label position to be 'Left'. This can be done by highlighting the control, scrolling down the properties list to the 'Field Label' section, and then selecting the 'Left' option from the 'Position' property dropdown.
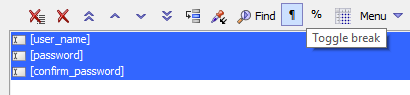
Highlight all of the controls and turn any toggle break that occurs after them off, using the icon in the toolbar.
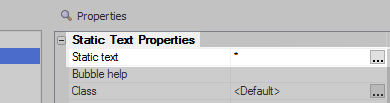
Highlight the 'user_name' textbox control again. Open the 'Other Controls' menu and click on the [Static Text] option to add some static text after the control.

Highlight the Static Text control in the controls tree. Set the 'Static text' property to be an asterix '*'.
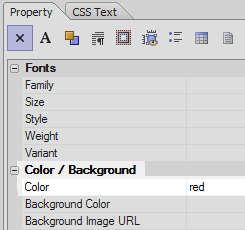
In the 'Static Text Properties' section click the [...] button next to the 'Style' property.
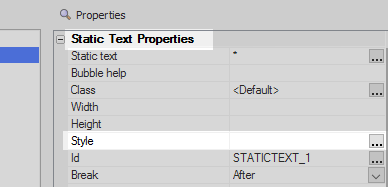
In the 'Style Editor' type 'red' next to the 'Color' setting. Click OK
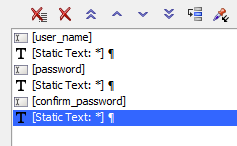
Add two more static text controls after the 'password' and 'confirm_password' controls. Give these static text controls the same 'Static text' and 'Style' properties as the first static text control.
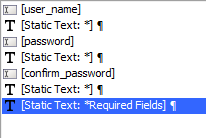
Add a fourth [Static Text] control to the component. Set the 'Static text' property for this control to read '*Required Fields'. Set the color setting in the control's 'Style' property to red.
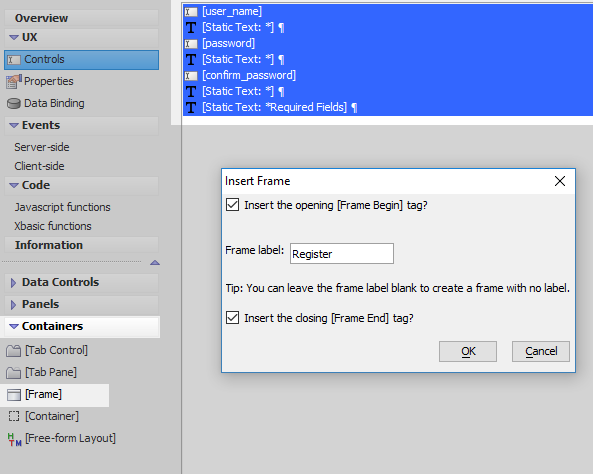
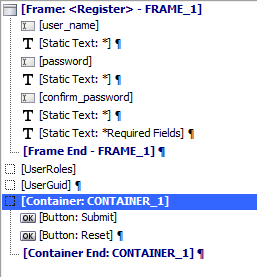
Highlight all of the controls in the controls tree. Open the 'Containers' menu and click on the [Frame] option to add a frame around the controls. Give the frame the label 'Register'.
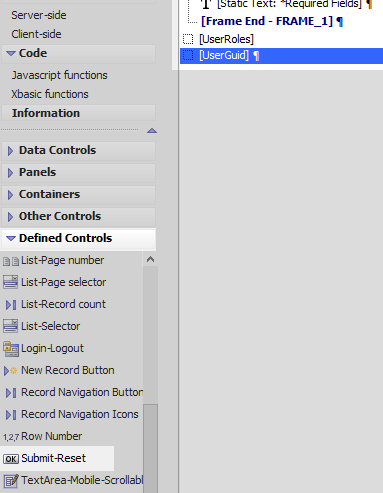
Highlight the closing tag of the [Frame] container. Open the 'Data Controls' menu and click on the [Hidden] option to add a hidden control to the component. Give the control the name 'UserRoles'. Do not give the control a label. Turn off the toggle break after the control.
Add a second [Hidden] control to the component. Give this control the name 'UserGuid'. Do not give this control a label.

Open the 'Defined Controls'. Click on the 'Submit-Reset' option at the bottom of the list to add these buttons to the component.
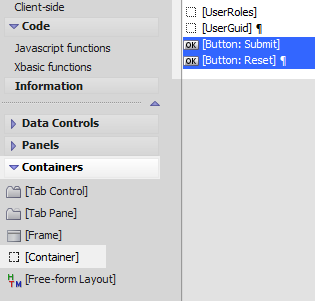
Highlight the 'Submit' and 'Reset' buttons in the controls tree. Open the 'Containers' menu and click on the [Container] option.
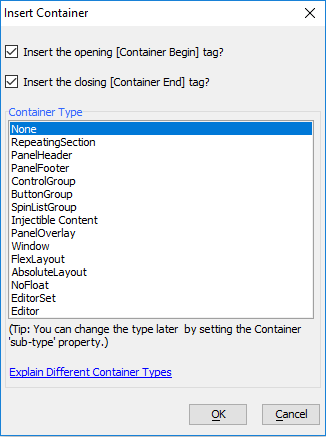
From the 'Container Type' list select the 'None' option and click 'Insert Around'.
The controls tree should now look like this:
Define Server-side Validation and Save Actions
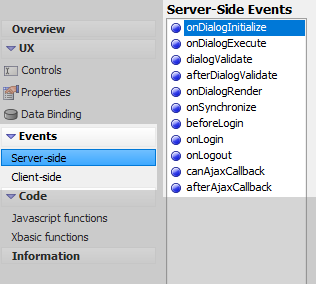
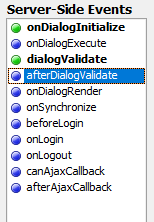
In the UX Builder expand the main 'Events' menu and click on 'Server-side' to open the serveri-side events page. Highlight the 'onDialogInitialize' event in the 'Server-Side Events' list.
Place the mouse cursor inside the event definition and add the following line of code.
e.control.UserRoles = a5ws_get_guid_from_group("NewUser")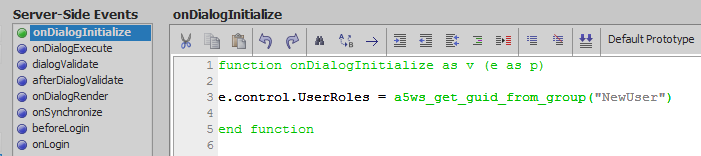
Click on the 'dialogValidate' event in the 'Server-Side Events' list.
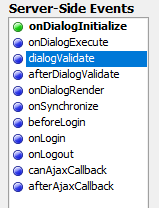
Place the mouse cursor inside the 'dialogValidate' event's definition and click the 'Action Scripting' button in the pages toolbar.
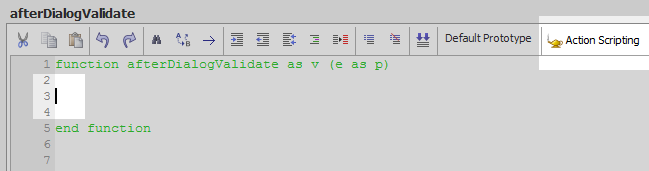
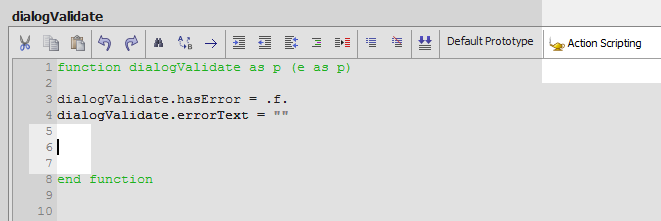 In this image all of the instructional text inside the event definition has been deleted for clarity.
From the list of actions, highlight the 'Validate Web Security Values' action and click OK.
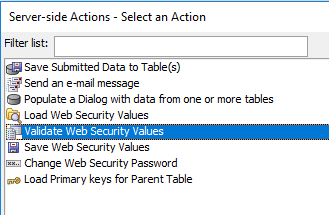
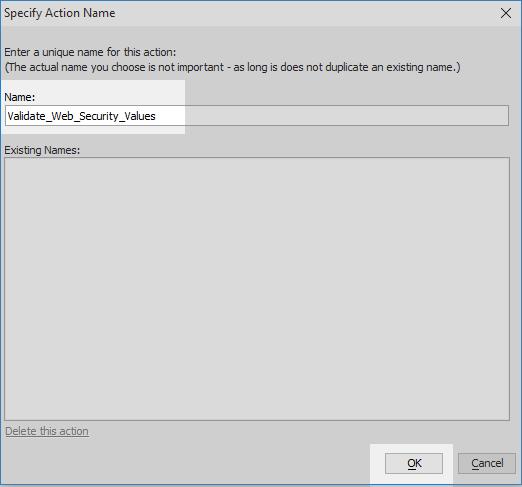
Click OK again to confirm the action's name.
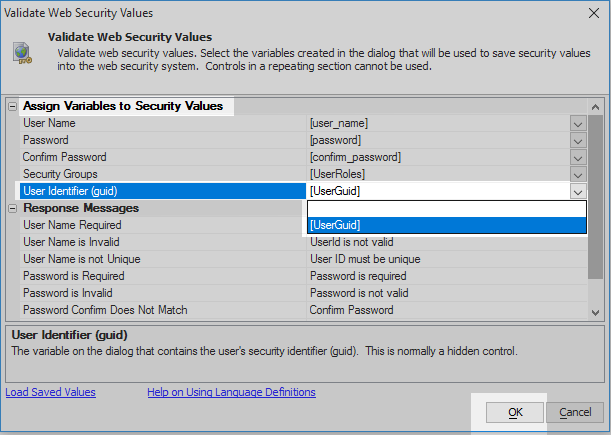
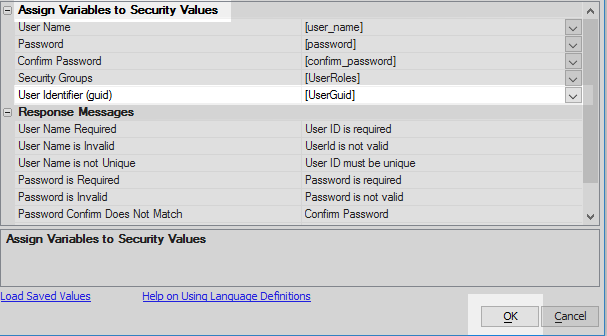
The 'Validate Web Security Values' dialog will open. In the 'Assigned Variables to Security Values' secion click the dropdown next to the 'User Name' setting and select the [user_name] field that you defined on the Controls page.
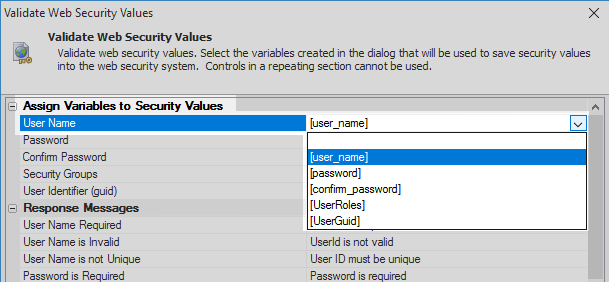
Set the 'Password' setting to the [password] field.

Set the 'Confirm Password' setting to be the [confirm_password] field.
Set the 'Security Groups' setting to be the hidden [UserRoles] control.

Set the 'User Identifier (guid)' setting to be the hidden [UserGuid] control. Click OK
In the 'Server-Side Events' list highlight the 'afterDialogValidate' event
Place the mouse cursor inside the event definition and then click on the 'Action Scripting'' button again.
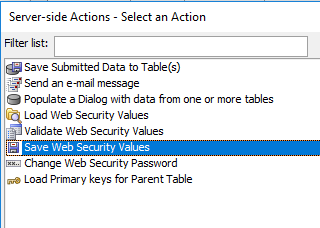
The 'Server-side Actions - Select an Action' dialog will open. Highlight the 'Save Web Security Values' action and click OK.
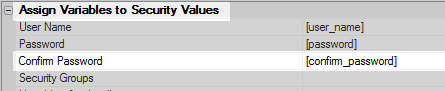
The 'Save Web Security Values' settings will open. In the 'Assign Variables to Security Values' section set the 'User Name' setting to be the [user_name] field.
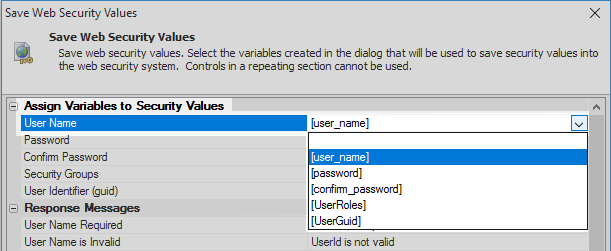 To automatically fill in all of the dropdown controls click the 'Load Saved Values' hyperlink in the lower left-hand corner of the screen.
Set the 'Password' setting to the [password] field.

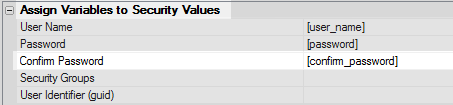
Set the 'Confirm Password' setting to the [confirm_password] field.
Set the 'Security Groups' setting to the [UserRoles] field.
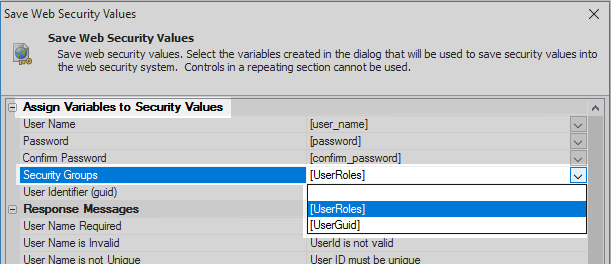
Set the 'User Identifier (guid)' setting to the [UserGuid] field. Click OK
Run the component in Working Preview, security validation will not work in Live Preview because the Security is not active in Live Preview.
Enter an invalid userId, password, and password confirmation into the textbox controls. If the the password entries do not match you should get a validation error. Similarly, if there is a space in the userId this will also produce an error; provided that the 'Password validation rules' were not changed in the Web Security folder.
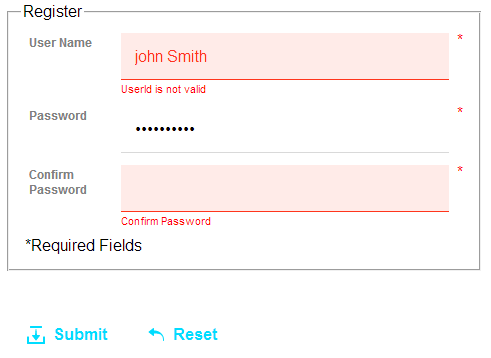
Now enter valid entries for all fields. If the entry is valid you should see a long line of dots fill the password field. This is the encrypted value of the password after it has been saved. If you are using the new encryption scheme (not legacy), then this should be nearly impossible to decrypt. The value changes on every save and is needed to determine if the user entered a new password at save. If the user submits the encrypted value then the system knows that no changes were made.

Viewing Entered Data
From the Web Projects Control Panel open the 'Web Security' folder.
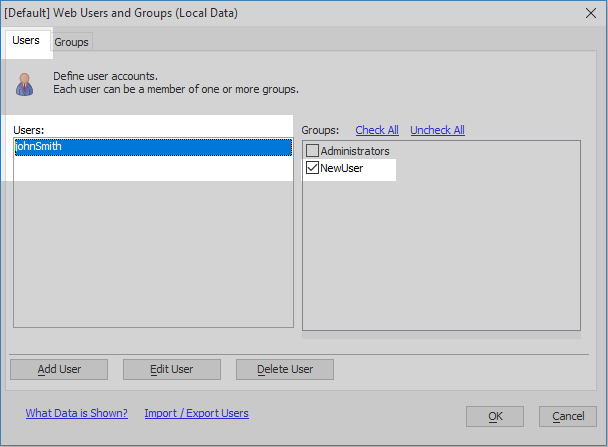
Open the 'Users and Groups' page.
On the 'Users' tab of the 'Web Users and Groups' page you should see the user name that was entered and, when the user is highlighted, the group that they belong to.
See Also